前言
之前尝试去安装了MySQL5.7的社区版本,今天来安装MySQL8.0的版本,并且以两种方式进行安装,一个是通过RPM包的安装,另一个则是编译的方式。
一. 前期准备
查看服务器IP
[root@localhost ~]# hostname -I
192.168.161.166 192.168.122.1
网络是否能ping通
[root@localhost ~]# ping www.baidu.com
PING www.a.shifen.com (14.215.177.38) 56(84) bytes of data.
64 bytes from 14.215.177.38 (14.215.177.38): icmp_seq=1 ttl=53 time=20.0 ms
64 bytes from 14.215.177.38 (14.215.177.38): icmp_seq=2 ttl=53 time=41.4 ms
关闭防火墙及SELinux
[root@localhost ~]# iptables -F
[root@localhost ~]# systemctl stop firewalld
[root@localhost ~]# setenforce 0
二. 使用RPM安装MySQL8.0
前面安装MySQL5.7的文章如果有学习到,那么对于安装MySQL8来说,一些安装的过程都是相同的。
Linux安装MySQL5.7数据库步骤
2.1 清空系统中mariadb的文件
在CentOS7上安装MySQL需要先清空mariadb相关的文件和软件包,否则后续安装过程中会影响到MySQL8的正式安装。
[root@localhost ~]# rpm -qa | grep mariadb
mariadb-libs-5.5.68-1.el7.x86_64
[root@localhost ~]# rpm -qa | grep mysql
[root@localhost ~]# rpm -e mariadb-libs-5.5.68-1.el7.x86_64
错误:依赖检测失败:
	libmysqlclient.so.18()(64bit) 被 (已安裝) postfix-2:2.10.1-9.el7.x86_64 需要
	libmysqlclient.so.18(libmysqlclient_18)(64bit) 被 (已安裝) postfix-2:2.10.1-9.el7.x86_64 需要
如果出现上述情况,可以直接加上--nodeps强制删除软件包
rpm -e mariadb-libs-5.5.68-1.el7.x86_64 --nodeps
再删除一些mariadb服务原本系统自带的文件,可以使用find进行查找
[root@localhost ~]# find / -name mariadb
[root@localhost ~]# find / -name mysql
/etc/selinux/targeted/active/modules/100/mysql
/usr/lib64/mysql
[root@localhost ~]# rm -rf /etc/selinux/targeted/active/modules/100/mysql /usr/lib64/mysql
2.2 使用阿里网络源
文件都清除之后,可以进行下一步,将自带的base源进行备份,当然直接删除也是可以的。
[root@localhost ~]# cd /etc/yum.repos.d/
[root@localhost yum.repos.d]# mv CentOS-Base.repo CentOS-Base.repo.bak
替换成网络源,这里替换成阿里的源使用
网络源地址:阿里云CentOS的源
[root@localhost yum.repos.d]# wget -O /etc/yum.repos.d/CentOS-Base.repo https://mirrors.aliyun.com/repo/Centos-7.repo
#查看源的状态信息
[root@localhost yum.repos.d]# yum repolist
#清空之前的一些软件包信息
[root@localhost yum.repos.d]# yum clean all
#重新建立元缓存
[root@localhost yum.repos.d]# yum makecache
2.3 安装MySQL8.0
从这一步开始才是正式安装MySQL的过程,先到官网下载需要的包
如果不知道怎么找,可以直接用ctrl+F进行搜索你需要的包地址,然后点击,再复制下载的全链接到服务器上。
MySQL的RPM包地址:直接点击这里即可
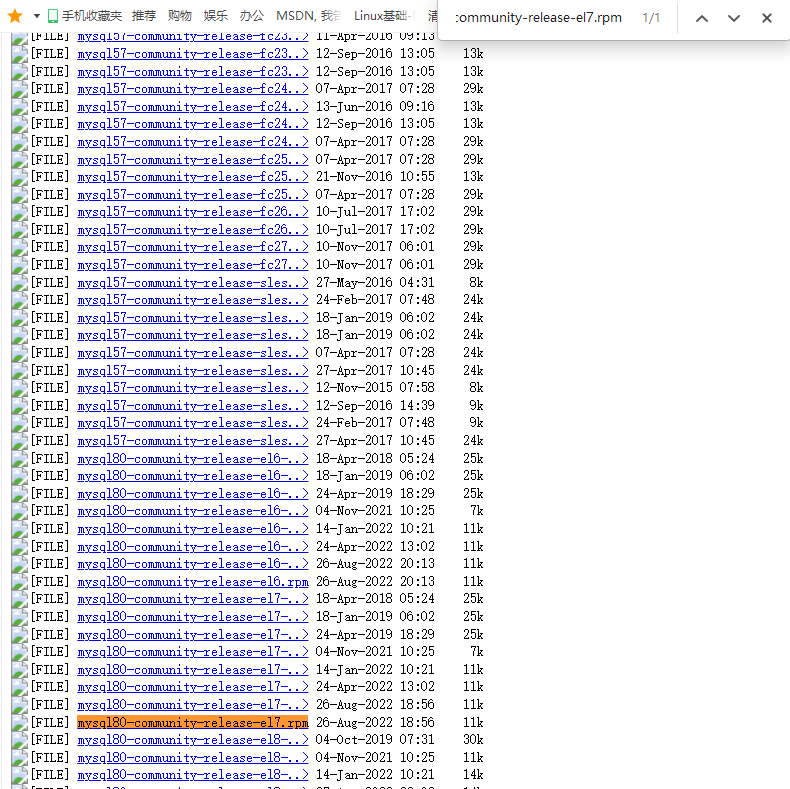
使用wget命令下载rpm包
wget https://repo.mysql.com/mysql80-community-release-el7.rpm
下载后默认rpm包位置是在本地的,需要使用rpm命令安装。

[root@localhost yum.repos.d]# rpm -ivh mysql80-community-release-el7.rpm
警告:mysql80-community-release-el7.rpm: 头V4 RSA/SHA256 Signature, 密钥 ID 3a79bd29: NOKEY
准备中...                          ################################# [100%]
正在升级/安装...
   1:mysql80-community-release-el7-7  ################################# [100%]
如果还不记得ivh代表什么意思的,这里在说一下
i 表示安装软件包
v 表示显示过程
h 表示显示进度条
执行了上一步操作,在/etc/yum.repos.d目录下有一个repo源 ,这个时候就可以使用yum命令安装这个源里面的程序了。
[root@localhost yum.repos.d]# ls
CentOS-Base.repo       CentOS-Vault.repo
CentOS-Base.repo.bak   CentOS-x86_64-kernel.repo
CentOS-CR.repo         epel.repo
CentOS-Debuginfo.repo  mysql80-community-release-el7.rpm
CentOS-fasttrack.repo  mysql-community-debuginfo.repo
CentOS-Media.repo      mysql-community.repo
CentOS-Sources.repo    mysql-community-source.repo
yum install mysql-community-server -y
2.4 启动服务
前面的安装已经结束,这时候就到了需要启动服务的时候
[root@localhost yum.repos.d]# systemctl start mysqld
[root@localhost yum.repos.d]# systemctl enable mysqld
查找服务的原始密码
[root@localhost yum.repos.d]# grep -aiw "Password" /var/log/mysqld.log
2023-03-09T09:03:09.167404Z 6 [Note] [MY-010454] [Server] A temporary password is generated for root@localhost: p!c?qf/4gfqU
冒号后面跟着的就是MySQL的原始密码

我们需要继续下一步,那就是将原始密码做修改。
[root@localhost yum.repos.d]# mysql -uroot -p
Enter password:     #输入原始密码
Welcome to the MySQL monitor.  Commands end with ; or \g.
Your MySQL connection id is 9
Server version: 8.0.32

Copyright (c) 2000, 2023, Oracle and/or its affiliates.

Oracle is a registered trademark of Oracle Corporation and/or its
affiliates. Other names may be trademarks of their respective
owners.

Type 'help;' or '\h' for help. Type '\c' to clear the current input statement.
#修改密码,密码尽可能的复杂些,至少需要8位以上。
mysql> alter user 'root'@'localhost' identified by 'Dianzan80/';
Query OK, 0 rows affected (0.00 sec)

mysql> exit
Bye
使用RPM安装过程就是这么多内容了,下面继续看如何编译安装MySQL8.0。
三.以二进制包安装MySQL8.0
以编译的方式进行安装数据库,首先需要知道压缩包的所在位置
编译软件包官网地址:点击这里
3.1 下载压缩包
下载MySQL8.0的压缩包
wget https://cdn.mysql.com//Downloads/MySQL-8.0/mysql-8.0.32-linux-glibc2.12-x86_64.tar.xz
解压包并移动到/usr/local/下
[root@localhost ~]# tar xf mysql-8.0.32-linux-glibc2.12-x86_64.tar.xz
[root@localhost ~]# mv mysql-8.0.32-linux-glibc2.12-x86_64 /usr/local/mysql
3.2 创建系统用户
创建一个用户方便管理数据库
[root@localhost ~]# groupadd mysql
[root@localhost ~]# useradd -r -g mysql -s /bin/false mysql
[root@localhost ~]# chown -R mysql:mysql /usr/local/mysql
3.3 设置mysql的全局变量
在/etc/profile 修改全局变量信息,在最后添加这两句。
[root@localhost ~]# vim /etc/profile
[root@localhost ~]# tail -n 2 !$
tail -n 2 /etc/profile
export MYSQL_HOME=/usr/local/mysql    1
export PATH=$MYSQL_HOME/bin:$PATH     2
[root@localhost ~]# source !$
source /etc/profile

3.4 初始化数据库
先提前创建一个存放数据的目录,创建在/usr/local/mysql/的目录下
[root@localhost ~]# cd /usr/local/mysql/
[root@localhost mysql]# mkdir data
这时候开始初始化数据库了
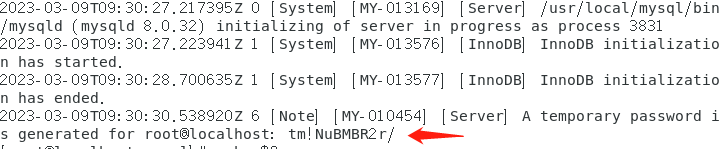
[root@localhost mysql]# mysqld --initialize --user=mysql --basedir=/usr/local/mysql --datadir=/usr/local/mysql/data
2023-03-09T09:30:27.217276Z 0 [Warning] [MY-011070] [Server] 'Disabling symbolic links using --skip-symbolic-links (or equivalent) is the default. Consider not using this option as it' is deprecated and will be removed in a future release.
2023-03-09T09:30:27.217395Z 0 [System] [MY-013169] [Server] /usr/local/mysql/bin/mysqld (mysqld 8.0.32) initializing of server in progress as process 3831
2023-03-09T09:30:27.223941Z 1 [System] [MY-013576] [InnoDB] InnoDB initialization has started.
2023-03-09T09:30:28.700635Z 1 [System] [MY-013577] [InnoDB] InnoDB initialization has ended.
2023-03-09T09:30:30.538920Z 6 [Note] [MY-010454] [Server] A temporary password is generated for root@localhost: tm!NuBMBR2r/
[root@localhost mysql]# echo $?
0
user表示数据库名称
basedir 表示数据库存放的位置
datadir 表示存放数据的地方
不清楚执行是否成功,可以使用echo $?来判断,为0表示没问题。
还有一点需要注意下,初始化之后会生成一个原始密码,需要知道并且等下用来登录数据库。
3.5 设置配置文件
在mysql目录下默认有个support-files的目录文件,需要将目录下的配置文件复制到/etc/init.d/作为服务的启动项。
[root@localhost support-files]# ll
总用量 20
-rwxr-xr-x. 1 mysql mysql  1061 12月 16 23:34 mysqld_multi.server
-rw-r--r--. 1 mysql mysql  2027 12月 17 00:26 mysql-log-rotate
-rwxr-xr-x. 1 mysql mysql 10576 12月 17 00:26 mysql.server
[root@localhost support-files]# cp mysql.server /etc/init.d/mysql.server
除此之外,还需添加一个配置文件在/etc/目录下
vim /etc/my.cnf
#以下是文件内要添加的信息,文件默认有内容,可以删除修改成如下内容。

[client]

port = 3306
socket = /tmp/mysql.sock
[mysqld]

#Mysql服务的唯一编号 每个mysql服务Id需唯一
server-id = 1

#服务端口号 默认3306
port = 3306

#mysql安装根目录
basedir = /usr/local/mysql

#mysql数据文件所在位置
datadir = /usr/local/mysql/data

#临时目录
tmpdir  = /tmp

#设置socke文件所在目录
socket = /tmp/mysql.sock

#主要用于MyISAM存储引擎,如果多台服务器连接一个数据库则建议注释下面内容
skip-external-locking

#只能用IP地址检查客户端的登录,不用主机名
skip_name_resolve = 1

#事务隔离级别,默认为可重复读,mysql默认可重复读级别(此级别下可能参数很多间隙锁,影响性能)
transaction_isolation = READ-COMMITTED

#数据库默认字符集,主流字符集支持一些特殊表情符号(特殊表情符占用4个字节)
character-set-server = utf8mb4

#数据库字符集对应一些排序等规则,注意要和character-set-server对应
collation-server = utf8mb4_general_ci

#设置client连接mysql时的字符集,防止乱码
init_connect='SET NAMES utf8mb4'

#是否对sql语句大小写敏感,1表示不敏感
#lower_case_table_names = 1

#最大连接数
max_connections = 400

#最大错误连接数
max_connect_errors = 1000

#TIMESTAMP如果没有显示声明NOT NULL,允许NULL值
explicit_defaults_for_timestamp = true

#SQL数据包发送的大小,如果有BLOB对象建议修改成1G
max_allowed_packet = 128M

#MySQL连接闲置超过一定时间后(单位:秒)将会被强行关闭
#MySQL默认的wait_timeout  值为8个小时, interactive_timeout参数需要同时配置才能生效
interactive_timeout = 1800
wait_timeout = 1800

#内部内存临时表的最大值 ,设置成128M。
#比如大数据量的group by ,order by时可能用到临时表,
#超过了这个值将写入磁盘,系统IO压力增大
tmp_table_size = 134217728
max_heap_table_size = 134217728

#数据库错误日志文件
log_error = error.log

#慢查询sql日志设置
slow_query_log = 1
slow_query_log_file = slow.log
#开启binlog
log_bin=on

#检查未使用到索引的sql
log_queries_not_using_indexes = 1

#针对log_queries_not_using_indexes开启后,记录慢sql的频次、每分钟记录的条数
log_throttle_queries_not_using_indexes = 5

#作为从库时生效,从库复制中如何有慢sql也将被记录
log_slow_slave_statements = 1

#慢查询执行的秒数,必须达到此值可被记录
long_query_time = 8

#检索的行数必须达到此值才可被记为慢查询
min_examined_row_limit = 100

#mysql binlog日志文件保存的过期时间,过期后自动删除
expire_logs_days = 5
那么就有一个疑问了,my.cnf这个配置文件是有什么用呢?
其实my.cnf是MYSQL的一个管理配置文件,通过修改这个文件里的内容可以达到优化MYSQL,提高MYSQL整体性能的功效。
3.6 启动数据库
以上的信息都配置好了,可不要忘了启动数据库。
service mysql.server start
最后看到有个SUCCESS就表示启动成功了。
3.6 修改数据库管理系统密码
还记得之前数据库的初始密码不,这里就需要用到了。
如果出现数据库不认识这个密码,加上单引号就可以登录了
[root@localhost mysql]# mysql -uroot -ptm!NuBMBR2r/
bash: !NuBMBR2r/: event not found
[root@localhost mysql]# mysql -uroot -p'tm!NuBMBR2r/'
mysql: [Warning] Using a password on the command line interface can be insecure.
Welcome to the MySQL monitor.  Commands end with ; or \g.
Your MySQL connection id is 8
Server version: 8.0.32

Copyright (c) 2000, 2023, Oracle and/or its affiliates.

Oracle is a registered trademark of Oracle Corporation and/or its
affiliates. Other names may be trademarks of their respective
owners.

Type 'help;' or '\h' for help. Type '\c' to clear the current input statement.

mysql> alter user 'root'@'localhost' identified by 'Dianzan001/!';
Query OK, 0 rows affected (0.01 sec)

mysql> exit
Bye
编译安装的过程也已经演示完了,接下来使用刚自己设置的密码即可直接登录数据库进行操作了。
总结
MySQL的编译相对来说复杂了一些,可以多尝试的去做几遍,就熟悉其步骤了。若觉得以上内容还行的,可以点赞支持一下!