在编程世界里,Python已经是名副其实的网红了。曾经一个学汉语言的研究生,问我怎么学Python,因为他们课程论文里需要用到文本分析,用Python来跑数据。我和他说,你看两天语法,就可以上手开干,不会的再查资料。后来这位同学半个月就用Python把论文数据搞好了。
所以Python最大优势在于容易学,门槛比Java、C++低非常多,给非程序员群体提供了用代码干活的可能性。当然Python能成为大众编程工具,不光光是因为易学,还因为Python有成千上万的工具包,遍布各行各业。
举10几个大众办公常见的例子,Python都能高效处理。
1、Python处理Excel数据
可以使用pandas、xlwings、openpyxl等包来对Excel进行增删改查、格式调整等操作,甚至可以使用Python函数来对excel数据进行分析。

读取excel表格:
import xlwings as xw
wb = xw.Book()  # this will create a new workbook
wb = xw.Book('FileName.xlsx')  # connect to a file that is open or in the current working directory
wb = xw.Book(r'C:\path\to\file.xlsx')  # on Windows: use raw strings to escape backslashes
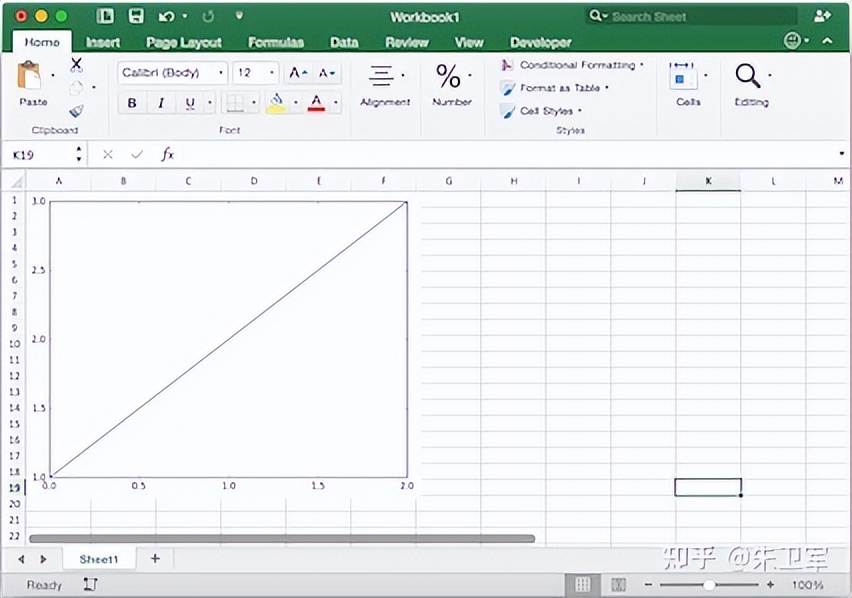
将matplotlib绘图写入excel表格:
import matplotlib.pyplot as plt
import xlwings as xw

fig = plt.figure()
plt.plot([1, 2, 3])

sheet = xw.Book().sheets[0]
sheet.pictures.add(fig, name='MyPlot', update=True)
2、Python处理PDF文本
PDF几乎是最常见的文本格式,很多人有各种处理PDF的需求,比如制作PDF、获取文本、获取图片、获取表格等。Python中有PyPDF、pdfplumber、ReportLab、PyMuPDF等包可以轻松实现这些需求。

提取PDF文字:
import PyPDF2
pdfFile = open('example.pdf','rb')
pdfReader = PyPDF2.PdfFileReader(pdfFile)
print(pdfReader.numPages)
page = pdfReader.getPage(0)
print(page.extractText())
pdfFile.close()
提取PDF表格:
# 提取pdf表格
import pdfplumber
with pdfplumber.open("example.pdf") as pdf:
    page01 = pdf.pages[0] #指定页码
    table1 = page01.extract_table()#提取单个表格
    # table2 = page01.extract_tables()#提取多个表格
    print(table1)
3、Python处理Email
在Python中可以使用smtplib配合email库,来实现邮件的自动化传输,非常方便。
import smtplib
import email
# 负责将多个对象集合起来
from email.mime.multipart import MIMEMultipart
from email.header import Header
# SMTP服务器,这里使用163邮箱
mail_host = "smtp.163.com"
# 发件人邮箱
mail_sender = "******@163.com"
# 邮箱授权码,注意这里不是邮箱密码,如何获取邮箱授权码,请看本文最后教程
mail_license = "********"
# 收件人邮箱,可以为多个收件人
mail_receivers = ["******@qq.com","******@outlook.com"]
mm = MIMEMultipart('related')
# 邮件正文内容
body_content = """你好,这是一个测试邮件!"""
# 构造文本,参数1:正文内容,参数2:文本格式,参数3:编码方式
message_text = MIMEText(body_content,"plain","utf-8")
# 向MIMEMultipart对象中添加文本对象
mm.attach(message_text)
# 创建SMTP对象
stp = smtplib.SMTP()
# 设置发件人邮箱的域名和端口,端口地址为25
stp.connect(mail_host, 25)
# set_debuglevel(1)可以打印出和SMTP服务器交互的所有信息
stp.set_debuglevel(1)
# 登录邮箱,传递参数1:邮箱地址,参数2:邮箱授权码
stp.login(mail_sender,mail_license)
# 发送邮件,传递参数1:发件人邮箱地址,参数2:收件人邮箱地址,参数3:把邮件内容格式改为str
stp.sendmail(mail_sender, mail_receivers, mm.as_string())
print("邮件发送成功")
# 关闭SMTP对象
stp.quit()
4、Python处理数据库
数据库是我们常用的办公应用,Python中有各种数据库驱动接口包,支持对数据库的增删改查、运维管理工作。比如说pymysql包对应MySQL、psycopg2包对应PostgreSQL、pymssql包对应sqlserver、cxoracle包对应Oracle、PyMongo包对应MongoDB等等。
对MySQL的连接查询
import pymysql
# 打开数据库连接
db = pymysql.connect(host='localhost',
                     user='testuser',
                     password='test123',
                     database='TESTDB')
# 使用 cursor() 方法创建一个游标对象 cursor
cursor = db.cursor()
# 使用 execute()  方法执行 SQL 查询
cursor.execute("SELECT VERSION()")
# 使用 fetchone() 方法获取单条数据.
data = cursor.fetchone()
print ("Database version : %s " % data)
# 关闭数据库连接
db.close()
5、Python处理批量文件
对很多办公场景来说,批量处理文件一直是个脏活累活,Python可以帮你脱离苦海。Python中有很多处理系统文件的包,比如sys、os、shutil、glob、path.py等等。
批量删除不同文件夹下的同名文件夹:
import os,shutil
import sys
import numpy as np
def arrange_file(dir_path0):
  for dirpath,dirnames,filenames in os.walk(dir_path0):
    if 'my_result' in dirpath:
      # print(dirpath)
      shutil.rmtree(dirpath)
批量修改文件后缀名:
import os
def file_rename():
    path = input("请输入你需要修改的目录(格式如'F:\\test'):")
    old_suffix = input('请输入你需要修改的后缀(需要加点.):')
    new_suffix = input('请输入你要改成的后缀(需要加点.):')
    file_list = os.listdir(path)
    for file in file_list:
        old_dir = os.path.join(path, file)
        print('当前文件:', file)
        if os.path.isdir(old_dir):
            continue
        if old_suffix != os.path.splitext(file)[1]:
            continue
        filename = os.path.splitext(file)[0]
        new_dir = os.path.join(path, filename + new_suffix)
        os.rename(old_dir, new_dir)
if __name__ == '__main__':
    file_rename()
6、Python控制鼠标
这是很多人的需求,实现对鼠标的自动控制,去做一些流水线的工作,比如软件测试。
Python有个pyautogui库可以任意地去控制你的鼠标。
控制鼠标左击/右击/双击函数以及测试源码:
# 获取鼠标位置
import pyautogui as pg
try:
    while True:
        x, y = pg.position()
        print(str(x) + " " + str(y))  #输出鼠标位置

        if 1746 < x < 1800 and 2 < y < 33:
            pg.click()#左键单击
        if 1200 < x < 1270 and 600 < y < 620:
            pg.click(button='right')#右键单击
        if 1646 < x < 1700 and 2 < y < 33:
            pg.doubleClick()#左键双击
except KeyboardInterrupt:
    print("\n")
7、Python控制键盘
同样的,Python也可以通过pyautogui控制键盘。
键盘写入:
import pyautogui
#typewrite()无法输入中文内容,中英文混合的只能输入英文
#interval设置文本输入速度,默认值为0
pyautogui.typewrite('你好,world!',interval=0.5)
8、Python压缩文件
压缩文件是办公中常见的操作,一般压缩会使用压缩软件,需要手动操作。
Python中有很多包支持文件压缩,可以让你自动化压缩或者解压缩本地文件,或者将内存中的分析结果进行打包。比如zipfile、zlib、tarfile等可以实现对.zip、.rar、.7z等压缩文件格式的操作。
压缩文件:
import zipfile
try:
  with zipfile.ZipFile("c://test.zip",mode="w") as f:
    f.write("c://test.txt")          #写入压缩文件,会把压缩文件中的原有覆盖
except Exception as e:
    print("异常对象的类型是:%s"%type(e))
    print("异常对象的内容是:%s"%e)
finally:
    f.close()
解压文件:
import zipfile
try:
  with zipfile.ZipFile("c://test.zip",mode="a") as f:
     f.extractall("c://",pwd=b"root") ##将文件解压到指定目录,解压密码为root
except Exception as e:
     print("异常对象的类型是:%s"%type(e))
     print("异常对象的内容是:%s"%e)
finally:
     f.close()
9、Python爬取网络数据
python爬虫应该是最受欢迎的功能,也是广大Python爱好者们入坑的主要的原因。
Python中有非常多的包支持爬虫,而爬虫包又分为抓取、解析两种。
比如说requests、urllib这种是网络数据请求工具,也就是抓取包;xpath、re、bs4这种会对抓取下来的网页内容进行解析,称为解析包。
爬取百度首页图片,并保存到本地:
# 导入urlopen
from urllib.request import urlopen
# 导入BeautifulSoup
from bs4 import BeautifulSoup as bf
# 导入urlretrieve函数,用于下载图片
from urllib.request import urlretrieve
# 请求获取HTML
html = urlopen("http://www.baidu.com/")
# 用BeautifulSoup解析html
obj = bf(html.read(),'html.parser')
# 从标签head、title里提取标题
title = obj.head.title
# 只提取logo图片的信息
logo_pic_info = obj.find_all('img',class_="index-logo-src")
# 提取logo图片的链接
logo_url = "https:"+logo_pic_info[0]['src']
# 使用urlretrieve下载图片
urlretrieve(logo_url, 'logo.png')
10、Python处理图片图表
图片处理、图表可视化涉及到图像处理,这也是Python的强项,现在诸如图像识别、计算机视觉等前沿领域也都会用到Python。
在Python中处理图像的包有scikit Image、PIL、OpenCV等,处理图表的包有matplotlib、plotly、seaborn等。
对图片进行黑白化处理:
from PIL import Image
from PIL import ImageEnhance
img_main = Image.open(u'E:/login1.png')
img_main = img_main.convert('L')
threshold1 = 138
table1 = []
for i in range(256):
  if i < threshold1:
    table1.append(0)
  else:
    table1.append(1)
img_main = img_main.point(table1, "1")
img_main.save(u'E:/login3.png')
生成统计图表:
import numpy as np
import matplotlib.pyplot as plt
N = 5
menMeans = (20, 35, 30, 35, 27)
womenMeans = (25, 32, 34, 20, 25)
menStd = (2, 3, 4, 1, 2)
womenStd = (3, 5, 2, 3, 3)
ind = np.arange(N)    # the x locations for the groups
width = 0.35       # the width of the bars: can also be len(x) sequence
p1 = plt.bar(ind, menMeans, width, yerr=menStd)
p2 = plt.bar(ind, womenMeans, width,
             bottom=menMeans, yerr=womenStd)
plt.ylabel('Scores')
plt.title('Scores by group and gender')
plt.xticks(ind, ('G1', 'G2', 'G3', 'G4', 'G5'))
plt.yticks(np.arange(0, 81, 10))
plt.legend((p1[0], p2[0]), ('Men', 'Women'))
plt.show()
小结
总之Python会成为大众化的编程语言,帮助到更多需要的人。